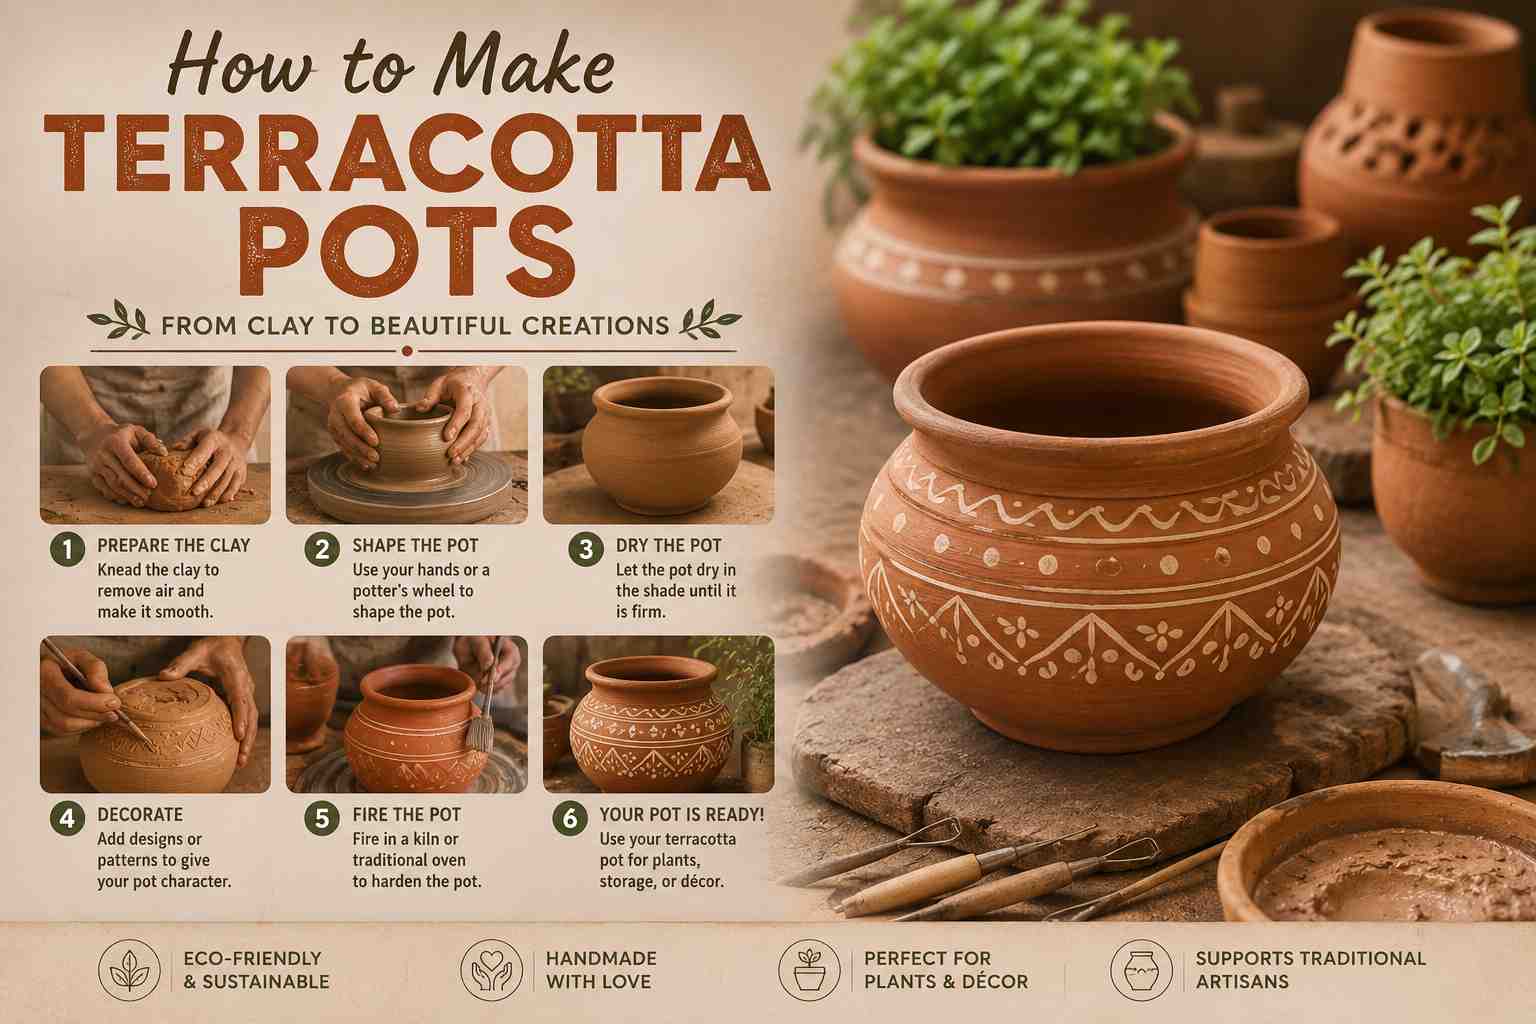
How to Make Terracotta Pots, Terracotta pots have outlasted empires. Ancient Greeks used them. The Romans fired them for roof tiles. And somewhere in a tomb in China, 8,000 life-size terracotta warriors are still standing guard after 2,000 years.
So if a civilisation could build an army from this stuff, you can probably make a plant pot.
Here’s everything you need to know about how to make terracotta pots — from raw clay to finished piece — using verified techniques trusted by potters worldwide.
What Is Terracotta, Exactly?
Before you dig your hands into clay, it helps to understand what you’re working with.
The word terracotta comes from the Italian terra cotta, meaning “baked earth.” According to Encyclopaedia Britannica, terracotta is a type of fired clay — fairly coarse, porous, and usually unglazed — that produces a colour ranging from dull ochre to red after firing.
That signature reddish-orange colour isn’t paint. As Wikipedia’s terracotta article explains, the iron oxides in the clay react with oxygen during firing, producing those warm earthy tones naturally. The exact shade depends on the clay’s iron content and the firing temperature.
Terracotta fires at a typical temperature of around 1,000°C (1,830°F), though historical examples show it can harden at temperatures as low as 600°C. It sits at a lower firing range than stoneware or porcelain, which makes it accessible and forgiving for beginners.
Its porous nature is actually its superpower for plant pots — the walls allow air and moisture to pass through the soil, which keeps roots healthier than in sealed plastic or ceramic containers.
What You Need to Get Started
You don’t need a professional studio to make terracotta pots. Here’s a straightforward list of materials:
Essential materials:
- Terracotta clay (available as a powder or pre-mixed block)
- A mixing container and water (if using powder)
- A flat, clean work surface covered with cloth or newspaper
- A small bowl of water (for smoothing)
- A wire clay cutter
- A wooden rib tool or butter knife (for smoothing walls)
- A needle tool (for drainage holes)
Optional but useful:
- A pottery wheel (speeds up the process dramatically)
- A mesh sieve (removes lumps from clay powder)
- A kiln (for proper firing — more on alternatives below)
As DoItYourself.com notes, a pottery wheel and kiln are expensive investments. If you’re just starting out, check whether a local pottery studio offers kiln access — most do, and it’s far cheaper than buying equipment.
Also Read:
How to Make a Macrame Wall Hanging
Step 1: Prepare Your Clay
This step decides everything that follows. Get it wrong and your pot will crack. Get it right and the rest flows naturally.
If using clay powder: Pour it into your mixing container and slowly add water while stirring. Keep adding water in small amounts until the clay feels soft, smooth, and pliable — similar to firm bread dough, as described in A House in the Hills’ beginner guide.
If using pre-made clay block: Skip straight to kneading.
Kneading (wedging): Knead the clay firmly with both hands for 5 to 10 minutes. Press it against a flat surface, fold it over itself, and repeat. This removes air bubbles — and air bubbles are your enemy. They expand during firing and cause cracks, or in dramatic cases, cause the pot to explode in the kiln.
If you want a finer texture, press the clay through a mesh sieve before kneading to remove small stones or lumps. It’s an optional step, but useful for cleaner finished pieces.
Once kneaded, the clay should feel uniform, smooth, and hold its shape without crumbling. Roll it into a ball — you’re ready to shape.
Step 2: Shape Your Pot
This is the part where the real fun begins. You have two main approaches depending on your tools.
Hand-Building (No Wheel Needed)
Hand-building works perfectly for beginners and doesn’t require any special equipment. The most common method for making pots is the coil technique.
Start by flattening a round piece of clay for the base — about a quarter-inch thick. Then roll additional clay into long rope-like coils, roughly the thickness of your thumb.
Stack the coils upward one by one, pressing each layer gently into the one below using your thumb and forefinger. As DoItYourself.com explains, a tall pot needs a proportionately wide base for structural stability — don’t try to build a tall chimney on a narrow circle.
Smooth the inner and outer walls with damp fingers or a rib tool as you go. The goal is to blend the coils together so the walls look and feel uniform.
Wheel Throwing
If you have access to a pottery wheel, the process becomes faster and more precise.
Center roughly 2 pounds of clay on the wheel. Wet your hands and spin the wheel slowly. Press the clay into a cone shape, then push it down to center it — this takes practice, but it’s worth getting right because off-center clay makes everything harder.
Once centered, press your thumb into the middle of the spinning clay and pull outward slowly to open the base, stopping about an inch from the bottom. Then pull the walls upward by squeezing gently between your thumb outside and fingers inside.
Use a wooden rib tool to smooth the walls and refine the shape. Cut the finished pot from the wheel with a wire clay cutter.
Whichever method you use, pierce a drainage hole at the base before the clay stiffens. A needle tool works well for this. Pots without drainage holes drown plants — skip this step and your garden will never forgive you.
Step 3: Dry the Pot Slowly
Once shaped, your pot needs to dry before it goes anywhere near heat. This stage is where most beginners lose patience — and where most cracks happen.
Place your pot on a flat, dry surface away from direct sunlight. Direct sun dries the surface too fast while the interior stays wet, and the tension between the two causes cracks.
Cover the pot loosely with plastic wrap or a slightly damp cloth. This slows the drying and keeps moisture even throughout the walls.
Let the pot dry for 2 to 5 days, rotating it occasionally so all sides dry at the same rate. Check for dryness by touching the surface — it should feel firm, cool, and no longer damp. This stage is called “leather hard,” and it’s when you can still carve or refine details without deforming the pot.
Once fully dry, the pot turns a lighter colour and feels significantly lighter in weight.
Step 4: Fire the Pot
Firing is what transforms soft dried clay into durable terracotta. Without heat, a terracotta pot will dissolve in rain.
Kiln Firing (Recommended)
A kiln gives you the most consistent and durable results. Fire terracotta at around 1,000°C (1,830°F). The firing process hardens the clay, drives out remaining water, and triggers the iron oxide reaction that produces terracotta’s characteristic colour.
After firing, let the kiln cool completely before opening it. Pulling pots out while still hot causes thermal shock — and thermal shock causes cracks. Patience here directly protects your work.
Pit Firing (Traditional Alternative)
No kiln? Pit firing is a traditional low-cost method that potters used long before electric kilns existed.
Dig a shallow pit in a safe, open outdoor area. Line it with dry combustible material — hay, wood shavings, or dried leaves. Place your pots inside and cover with more combustible material. As Rural Handmade’s terracotta guide explains, the fire burns downward over one to two days, and the chemicals from the burning material actually absorb into the clay, creating natural colour variations in the finished piece.
Pit-fired pots are more rustic and less durable than kiln-fired ones, but they carry a visual character that kiln firing simply can’t produce.
Air-Drying (For Decorative Indoor Use Only)
If you use self-hardening terracotta clay, you can skip firing entirely. Place the pot in a shaded, well-ventilated area and allow it to air-dry for 2 to 4 days. Once dry, seal it with beeswax, linseed oil, or a clear matte spray for protection.
Air-dried pots work well as indoor decorative pieces or for light indoor plant use. They are not suitable for outdoor use or regular watering — moisture will eventually soften and break them down.
Step 5: Glaze or Finish (Optional)
Terracotta looks beautiful in its natural state. The classic reddish-brown is timeless for a reason. But if you want to add colour or protection, you have a few options.
Glazing: Apply a ceramic glaze with a brush, by dipping, or by pouring. Glazing makes the surface waterproof and adds colour depth. The pot goes back into the kiln for a second firing after glazing. Note that unglazed terracotta is not naturally waterproof — only glazed terracotta is.
Painting: If you prefer paint, use acrylic paint formulated for outdoor use and apply two thin coats rather than one thick layer. Finish with a weatherproof sealant to protect the design from moisture and sun, as detailed in A Little Delightful’s DIY guide.
Leaving it natural: Honestly, many experienced potters do exactly this. Natural terracotta develops a beautiful patina over time as minerals from water and soil build up on the surface. That aged look is genuinely hard to fake.
Common Mistakes to Avoid
Making terracotta pots is forgiving once you understand the material. These are the mistakes worth avoiding:
Skipping the wedging. Air bubbles are invisible until your pot cracks or explodes in the kiln. Always wedge thoroughly.
Drying too fast. Direct sunlight or heat speeds up surface drying and causes tension cracks. Slow, even drying is non-negotiable.
Uneven wall thickness. Thick bases with thin walls — or the reverse — dry and fire unevenly. Aim for consistent thickness throughout.
Rushing the cooling. Thermal shock from pulling a pot out of a hot kiln too soon will undo hours of work. Let it cool fully inside the kiln.
Forgetting the drainage hole. This one isn’t about the pot — it’s about your plants. Add the hole before the clay stiffens completely.
Why Terracotta Pots Are Worth the Effort
You can buy a plastic pot for less than a cup of coffee. So why make one?
Because a handmade terracotta pot is genuinely better for plants, thanks to the clay’s natural porosity. It regulates soil moisture and temperature, which reduces root rot — a common killer of potted plants. According to material-properties.org, terracotta is also fully recyclable: broken or unused pieces get ground into grog (fired clay) and added to new clay bodies.
And there’s the simple satisfaction of making something that lasts. Properly made terracotta pots can survive decades of outdoor use. Ancient civilisations built them to last thousands of years.