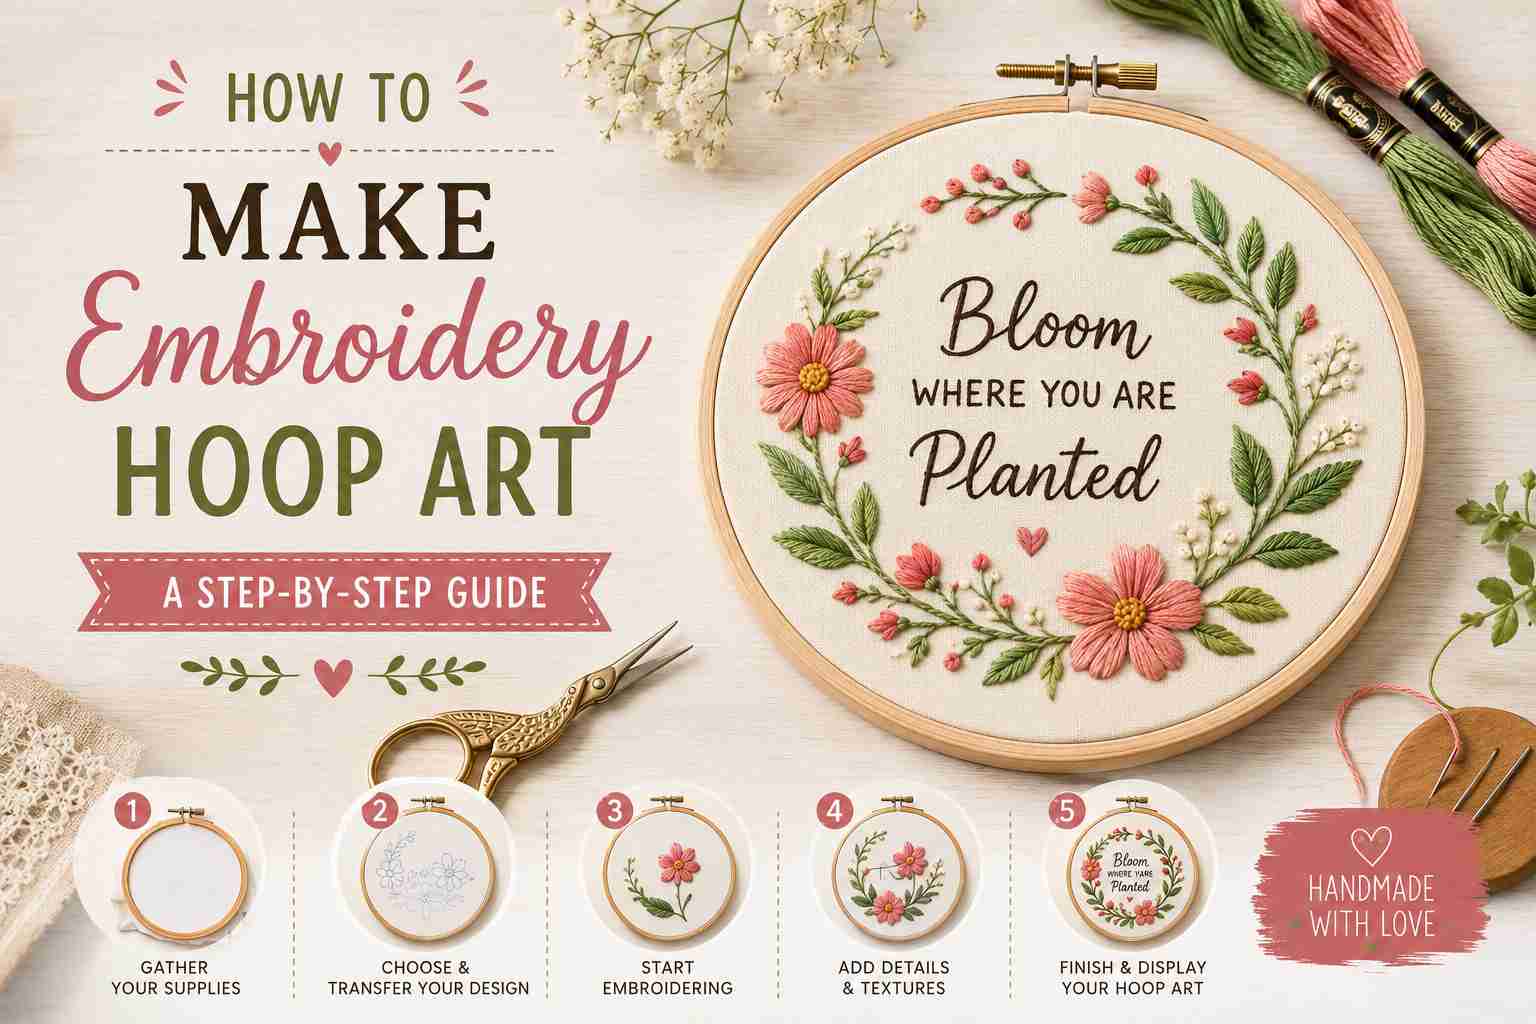
How to Make Embroidery Hoop Art, Let’s be honest — embroidery hoop art looks like something only patient, artistic people do. The kind who drink tea from handmade mugs and have perfectly organised craft drawers.
But here’s the truth: it’s far more accessible than it looks. You don’t need a fine arts degree. You don’t even need particularly steady hands. You need a few simple tools, about two hours, and the willingness to start with an ugly first stitch.
This guide covers everything — from choosing your supplies to hanging your finished piece on the wall — with real techniques that actually work.
What Is Embroidery Hoop Art?
Embroidery hoop art is hand-stitched needlework displayed directly inside a wooden or plastic hoop, which also serves as the frame. No separate picture frame needed — the hoop itself does the job.
The appeal is real: it’s meditative, customisable, budget-friendly, and the finished piece doubles as wall décor that feels genuinely personal. According to HobbyWorks, embroidery hoop art has taken the craft world by storm precisely because it is endlessly adaptable — beginner or experienced, there’s always a project at the right level.
What You Need to Get Started
Keep the supply list simple. You don’t need a specialty store haul to make your first embroidery hoop art piece.
Embroidery hoop: A 6-inch wooden hoop is the recommended starting size for beginners. It gives you enough space to work with, keeps fabric tension manageable, and produces a finished piece that looks good on any wall.
Fabric: Plain cotton quilting fabric works best. It’s easy to work with, holds tension well, and takes dye and pencil marks cleanly. Iron it flat before you start — wrinkles in your fabric create wrinkles in your final design, and no amount of stitching fixes that.
Embroidery floss: Standard six-strand cotton embroidery floss (DMC is the most widely available brand) works for virtually every project. You’ll typically separate the strands and work with two or three at a time.
Embroidery needles (sizes 1–10): Embroidery needles have a larger eye than regular sewing needles, which makes threading multiple strands far easier. Match needle size to thread thickness to avoid fraying.
Small embroidery scissors: Sharp, fine-tipped scissors let you cut close to the fabric without accidentally snipping your design.
Water-erasable fabric marker: This lets you draw or trace your design directly onto the fabric, then wipe it off with a damp cloth once you finish stitching. It disappears cleanly — almost like magic, as CreateAndCraft notes.
Optional: A lightbox or bright window for tracing printed patterns, and a needle threader if you find threading by hand frustrating.
Step 1: Set Up Your Hoop Correctly
This step matters more than beginners realise. Poor hoop tension creates puckered stitches that no technique can fix.
Loosen the screw at the top of the outer ring. Separate the two rings. Place your fabric flat over the inner ring, then push the outer ring down over it.
Before tightening the screw fully, pull the fabric gently but firmly on all sides — top, bottom, left, right — until the surface feels drum-tight. Pumora’s tutorial on hoop setup describes this well: if you stretch unevenly, the fabric distorts when you remove it from the hoop later, pulling your finished design out of shape.
Once the fabric feels taut and even, tighten the screw with a screwdriver. The surface should feel firm when you tap it lightly.
Step 2: Transfer Your Design
You need a design on your fabric before you start stitching. A few reliable methods work for this.
Lightbox or window method: Print or draw your design on paper. Place the paper against a bright window or lightbox, lay your fabric over it, and trace the design using your water-erasable marker. This works well on light or medium-coloured fabrics.
Transfer paper: Carbon or transfer paper lets you transfer designs directly onto darker fabrics where a window trace won’t show up.
For your first project, keep the design simple. HobbyWorks recommends botanical motifs — leaves, flowers, simple branches — because they look impressive even with basic stitches, and small irregularities read as natural rather than as mistakes.
Avoid intricate lettering or fine detail work until you’ve built confidence with your stitch tension.
Step 3: Learn These Six Essential Stitches
There are hundreds of embroidery stitches, but you only need six to make genuinely beautiful embroidery hoop art. Packlove confirms these as the six fundamental stitches for any beginner: running stitch, backstitch, split stitch, stem stitch, satin stitch, and French knot.
Running stitch: The most basic stitch — needle in, needle out, creating a dashed line. Great for outlines, borders, and simple details.
Backstitch: Creates a solid, unbroken line. You stitch forward by coming up ahead of the previous stitch, then going back to meet it. It’s the go-to stitch for outlines and lettering because the result looks clean and defined.
Split stitch: Similar to backstitch but each new stitch pierces through the middle of the previous one, creating a slightly textured rope-like line. Excellent for curves.
Stem stitch: Creates a twisted, rope-like effect along a line. Perfect for flower stems, curves, and any element where you want gentle visual movement. Beginner-friendly and very forgiving on imperfect curves.
Satin stitch: Fills shapes with solid, smooth colour by placing parallel stitches side by side. Caydo describes it as the “queen of embroidery” for the polished, painted look it creates. It takes practice to keep the edges neat, but once you get it, it transforms a piece.
French knot: A small, raised dot created by wrapping thread around the needle before pushing it back through the fabric. Takes a few tries to get right, but it adds wonderful texture — use it for flower centres, dotted patterns, berries, and decorative accents.
Work with thread lengths of about 18 inches. Longer threads tangle and knot, slow you down, and create uneven tension.
Step 4: Start Stitching
Begin by knotting the end of your thread and pulling the needle up through the back of the fabric to the front at your starting point.
Work with consistent tension — not too tight, not too loose. Tight stitches pucker the fabric. Loose stitches sit unevenly and snag. The goal is a stitch that sits flat and smooth on the surface.
Build your design in logical sections. Outlines first (backstitch or stem stitch), then fills (satin stitch), then texture and detail (French knots, running stitch). This order keeps your design clean and prevents needle access issues in tight areas.
When you finish a thread or change colour, run the needle under a few existing stitches on the back of the fabric and snip. No need to knot again — the existing stitches hold the thread securely.
Step 5: Finishing the Back
Here’s where most beginners go wrong — they forget about the back entirely. If you plan to display your embroidery hoop art, a neat back matters, especially if the hoop hangs somewhere people can walk around it.
Once you finish stitching, tighten the hoop screw fully if it’s loosened during work.
Gathering method (recommended for beginners): Trim the excess fabric around the hoop, leaving about 1 to 1.5 inches of overhang. Thread a needle and run a gathering stitch (long running stitch) around the entire edge of the excess fabric. Pull the thread to cinch the fabric inward toward the back of the hoop, then knot securely. This creates a neat, gathered finish.
Felt backing: Cut a circle of felt slightly smaller than the inner diameter of your hoop. Centre it over the gathered back and whip stitch it in place. This hides all thread ends, knots, and gathering stitches — and gives the back a professional, gallery-ready look, as MaggieFrameStore describes.
No-sew option: Run a line of hot glue along the inside edge of the inner hoop and press the trimmed fabric down to secure it. Fast and effective, though less adjustable if you ever need to re-hoop.
Step 6: Display Your Embroidery Hoop Art
One of the best things about embroidery hoop art is that the hoop is the frame. You don’t need anything extra to make it look finished.
Hanging on the wall: Use the hoop’s metal screw clasp as a hanger directly on a nail or hook. Alternatively, thread a short length of ribbon or twine through the clasp and hang it from a nail or removable adhesive hook.
Gallery wall: Group multiple hoops in different sizes for an arrangement that looks deliberately curated. EdinYarnFest recommends varying sizes, maintaining consistent spacing, and mixing shapes to create visual interest without clutter.
Shelf display: A felt-backed hoop can stand on an easel or lean against books on a shelf for a casual, changeable display that doesn’t require any wall holes.
Protect your finished piece from direct sunlight, which fades thread colour over time. Gently dust the surface with a soft brush rather than wiping, which can snag stitches.
Also Read:
How to Make Resin Art Coasters
How to Make a Macrame Wall Hanging
Common Beginner Mistakes (and How to Avoid Them)
Starting with thread that’s too long. Keep thread lengths to 18 inches maximum. Longer lengths tangle, fray at the eye, and create uneven tension across the work.
Skipping the iron. Always iron your fabric before hooping. Wrinkles lock in once you stitch over them, and no amount of pressing fixes puckered finished fabric.
Hooping too loose. If your fabric isn’t drum-tight in the hoop, your stitches will pucker when you remove it. Re-pull the fabric and retighten the screw before you start stitching.
Over-trimming the fabric backing too early. Leave generous excess fabric around the hoop until your piece is completely finished and you’re certain of your display method. Over-trimming limits your options.
Choosing a complicated first design. Intricate lettering and fine detail work require stitch consistency that takes practice to develop. Botanicals, simple geometric shapes, and abstract patterns are far more forgiving and still look striking.
Final Thoughts
Making embroidery hoop art requires patience more than skill, and the skill builds faster than you’d expect.
Your first piece won’t be perfect. The back will probably look chaotic. A French knot or two will refuse to cooperate. That’s completely normal, and it doesn’t stop the front from looking genuinely beautiful.
The six stitches in this guide cover the vast majority of designs you’ll ever want to make. Master those, then explore from there — chain stitch, lazy daisy, woven wheel rose, and dozens of others all build on the same foundations.
Start with a 6-inch hoop, a floral design, and a single colour. In a few hours, you’ll have a finished piece of embroidery hoop art on your wall.
That’s a good afternoon.