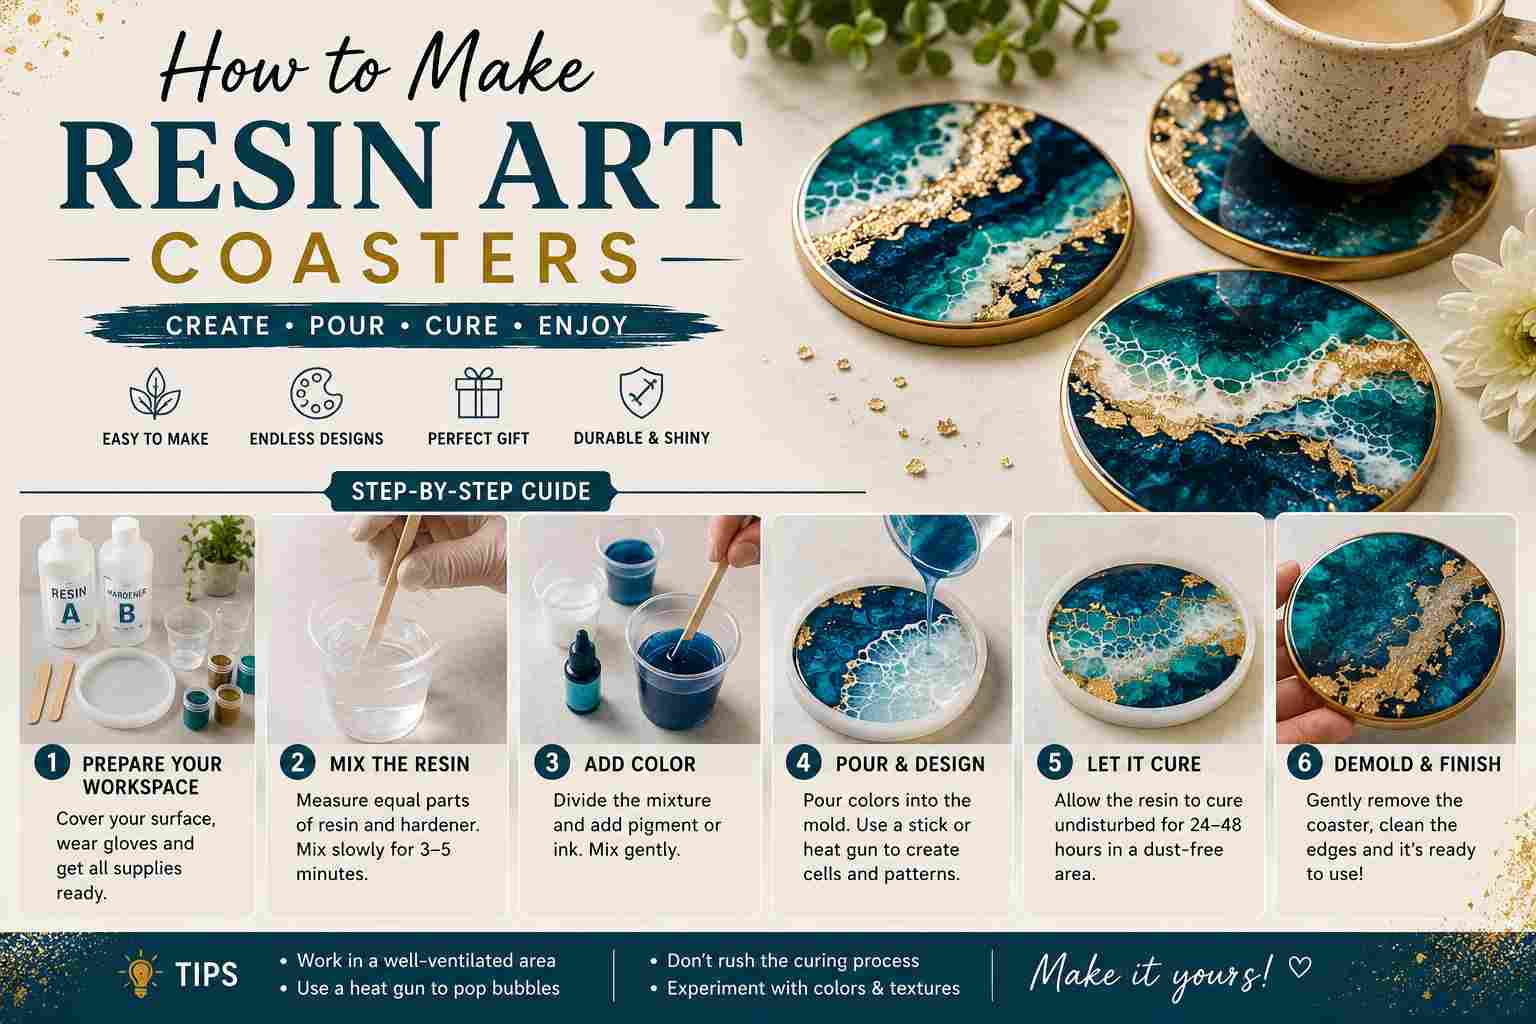
How to Make Resin Art Coasters, So you’ve seen those gorgeous, glossy coasters on Pinterest — the ones with swirling colours, pressed flowers, or gold flakes suspended inside like tiny frozen universes. And now you’re here, wondering if you can actually make them yourself.
The answer is yes. Absolutely yes.
Making resin art coasters is one of the most beginner-friendly DIY projects you can pick up. The process is satisfying, the results look expensive, and every single piece you make will be one of a kind. That last part isn’t a marketing slogan — it’s just how resin works. No two pours ever look identical.
Let’s walk through everything you need to know, step by step.
What Is Resin Art — and Why Are Coasters the Perfect Starting Point?
Epoxy resin is a two-part system: resin and hardener. When you mix them together, a chemical reaction starts. The mixture gradually hardens into a crystal-clear, durable solid. You can colour it, embed things in it, swirl it, layer it — and once cured, it’s waterproof and surprisingly tough.
Coasters make the ideal beginner project for a few reasons. The molds are small, so you don’t need large quantities of resin. The shapes are simple. And if your first attempt doesn’t go quite as planned, you’ve only lost a bit of material — not a whole countertop’s worth.
As Skillshare’s resin guide puts it, coasters let beginners experiment with colours, patterns, and embedded items while keeping the project manageable and low-stakes.
What You Need Before You Start
Gather everything before you mix a single drop. Resin work is time-sensitive — once you start mixing, you need to move through the steps without hunting around for supplies.
The essentials:
- Epoxy resin and hardener — Use craft-grade epoxy specifically designed for artistic projects. Most beginner-friendly options use a 1:1 mixing ratio by volume, which makes measuring simple. UltraClear Art & Craft Epoxy is one commonly recommended option for small projects.
- Silicone coaster molds — Silicone is non-negotiable here. Resin won’t bond to silicone, which means your finished coasters release cleanly without damage. Molds come in round, square, hexagonal, and geometric shapes.
- Measuring cups — Accurate measurements matter. Incorrect ratios mean your resin won’t cure properly. Use a digital scale or cups with clear measurement lines.
- Stir sticks — Wooden or plastic, both work fine. Use a fresh one for each pour.
- Nitrile gloves — Not latex. As noted by Entropy Resins’ safety guide, nitrile provides proper chemical resistance; latex does not.
- Respirator mask with organic vapor cartridges — A dust mask is not sufficient. Epoxy releases volatile organic compounds (VOCs) during mixing and curing.
- Safety goggles — Protect your eyes from accidental splashes.
- Heat gun or butane lighter — For popping bubbles after pouring.
- Dust cover — A cardboard box or plastic container to cover your poured coasters while they cure.
For colour and decoration:
- Resin dyes or alcohol inks (for transparent, saturated colour)
- Mica powder (for pearlescent, metallic shimmer)
- Glitter or holographic flakes
- Pressed or dried flowers
- Gold leaf flakes
- Seashells, small crystals, or any flat embellishments
Safety First — Read This Before You Open the Bottles
This section isn’t here to scare you. It’s here so you do this properly.
Epoxy resin releases fumes containing volatile organic compounds (VOCs) when mixed. Prolonged exposure can cause dizziness and headaches. Skin contact with uncured resin can cause allergic reactions, including redness, itching, or chemical burns.
Always work in a well-ventilated space to dissipate fumes during the curing process. Wear proper PPE, including gloves and a mask, to protect your skin and respiratory system.
Never pour uncured resin down the drain — it can clog pipes and pollute water systems. Always cure leftover resin first before disposal.
Work near an open window, run a fan, or work outdoors if the weather allows. The more airflow, the better — especially during mixing, when fumes are most concentrated.
Step-by-Step: How to Make Resin Art Coasters
Step 1 — Set Up Your Workspace
Choose a flat, level surface. Cover it with a silicone mat, parchment paper, or old newspaper to catch spills. Put on your gloves, goggles, and respirator before opening any bottles. Place your molds on the covered surface and have all your decorative materials within arm’s reach.
Room temperature matters. Most epoxy resins cure best between 21°C and 24°C (70°F–75°F). Cold rooms slow curing; overly hot rooms can cause the resin to cure too fast and create excess heat.
Step 2 — Measure and Mix Your Resin
Most craft epoxy resins use a 1:1 ratio by volume — equal parts resin and hardener. Always check your specific product’s instructions, because ratios can vary between brands.
Measure out equal parts of both resin and hardener into separate cups. Pour the hardener into the resin. Using a wooden stirrer, mix for 5 minutes. Stir thoroughly until you see no more streaks between the resin and hardener and the mixture looks clear.
Mix slowly and deliberately. Vigorous stirring introduces extra air bubbles. Scrape the sides and bottom of your cup as you go — unmixed resin along the edges stays sticky even after curing.
Step 3 — Add Colour and Pigment
Now comes the fun part.
If you’re using resin dyes, add a few drops to your mixed resin and stir until the colour is even throughout. Start with less than you think you need — you can always add more, but you can’t remove it. More dye creates a deeper, more opaque colour; less dye gives a translucent, jewel-like effect.
For mica powder, add a small amount and stir in completely for a metallic, shimmer finish.
If you want multiple colours in one coaster, split your mixed resin into separate small cups and colour each portion individually.
Step 4 — Pour Your First Layer
Add enough resin to fill the mold about halfway. The resin should completely fill the bottom of the mold from edge to edge. This provides the foundation for the colours, flowers, or other decorations you want to add.
If you’re embedding objects like dried flowers or shells, this first layer acts as a “glue coat” to hold them in place. Pour just enough to cover the base, then gently press your decorative elements into position.
Use tweezers for precise placement of delicate items like flower petals. Make sure embedded objects are thinner than the depth of your mold — anything that pokes above the final resin surface will affect the flatness of your coaster.
Step 5 — Remove Bubbles
After pouring, bubbles will rise to the surface. This is completely normal.
Leave the resin for about 5 minutes to let bubbles rise to the surface, but don’t leave it longer than 15 minutes as the mixture will start to set. Use a butane lighter held at least 6 inches above the surface, moving it over the whole area to pop bubbles.
A heat gun works equally well and gives you more control. Keep it moving — holding heat in one spot for too long can scorch or crater the surface.
Step 6 — Pour the Second Layer and Cure
Once your embedded items are set in the first layer (after about 24 hours), mix a fresh batch of resin and pour the second layer to fill the mold completely. This seals the embedments and creates a smooth, level top surface.
Cover the coasters with a dust cover and leave them alone for at least 24 hours.
Dust is your enemy during curing. Even a single speck landing on wet resin becomes a permanent part of your coaster. Keep pets out of the room and avoid disturbing the area.
Step 7 — Demold and Finish
After a full 24 hours (some brands recommend 48 hours for full cure — check your instructions), gently peel back the edges of the silicone mold and pop the coaster out.
If your coaster edges have overflow or sharp bits, sand them gently with fine-grit sandpaper, starting with 400, then moving to 600 and 800 grit. Work under running water to prevent dust. Finish by polishing with resin polish or car polish for a glossy edge.
If you want extra protection and shine, pour a final thin topcoat of fresh resin over the cured coaster. Let it cure for another 24 hours.
Also Read:
How to Make a Macrame Wall Hanging
Resin Coaster Design Ideas to Try
Once you’re comfortable with the basic process, experiment with these styles:
Geode coasters — Use acrylic paint, gold leaf flakes, and irregular silicone molds to mimic the look of sliced geode crystals. Add white paint at the edges and metallic veining through the centre.
Botanical coasters — Press and fully dry flowers before embedding them. Damp flowers introduce moisture that creates cloudiness or bubbles in the resin.
Ocean-inspired coasters — Mix teal and white resin, then use a straw or heat gun on a low setting to blow the white resin into wave-like shapes across the surface.
Galaxy coasters — Layer deep blues, purples, and black with holographic glitter and small metallic flakes for a night-sky effect.
Minimalist ink coasters — Add a few drops of alcohol ink to clear resin and let the colours bloom and swirl naturally. No steering required — the ink moves on its own.
Common Mistakes and How to Avoid Them
Sticky coasters after curing — This almost always means incorrect mixing ratios or insufficient stirring. Measure carefully and stir thoroughly every time.
Cloudy finish — Often caused by moisture. Make sure dried flowers are completely dry before embedding. Also avoid working in very humid conditions.
Too many bubbles — Happens from overly vigorous stirring. Mix slowly and use your heat source promptly after pouring.
Resin won’t release from mold — Make sure you’re using silicone molds. Other materials may bond permanently to epoxy resin.
Final Thoughts
Making resin art coasters sits in that rare sweet spot where the process is genuinely relaxing, the results are beautiful, and the learning curve is manageable even for a complete beginner.
Your first set might not look exactly like what you saw on Pinterest. That’s fine — and honestly, that’s part of the appeal. Every coaster is different, and every pour teaches you something about how resin moves, how colours interact, and how much creative control you actually have over a chemical process.
Start simple. Master the basics. Then pour a second set with that new confidence.
The molds will be waiting.